
Creating, Editing, and Deleting a Lead

In the Customer Relationship Management module (CRM), a "lead" refers to a person or entity that has shown interest in a company's products or services but has not yet progressed to become a customer.
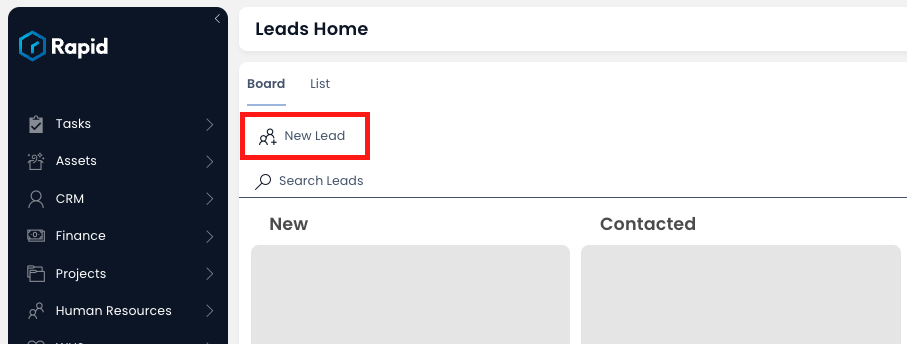
Creating a New Lead

  1. In Explorer select CRM > Leads

A screenshot depicting how the user can navigate to the "Leads" table using the sidebar. In this example, the user has pressed the "CRM" folder, which has icon of a person. The user has then pressed the "Leads" table button, which has an icon of two people and a plus symbol. The menu buttons that the user has pressed have a white background with blue text, whereas the menu items when have not been selected are the opposite.

  1. Select either the Board or List tabs, then click New Lead

A screenshot of the "New Lead" button as it appears in the Command Bar of a the Leads board or Leads list. The screenshot is annotated with a red box that highlights the location of the "New Lead" button. The button has an icon of two people and a plus symbol.

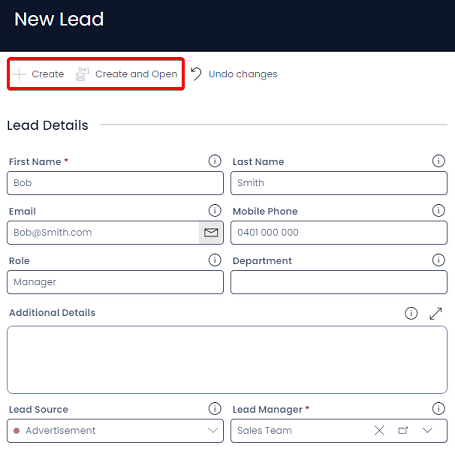
  1. Enter all relevant details
Note

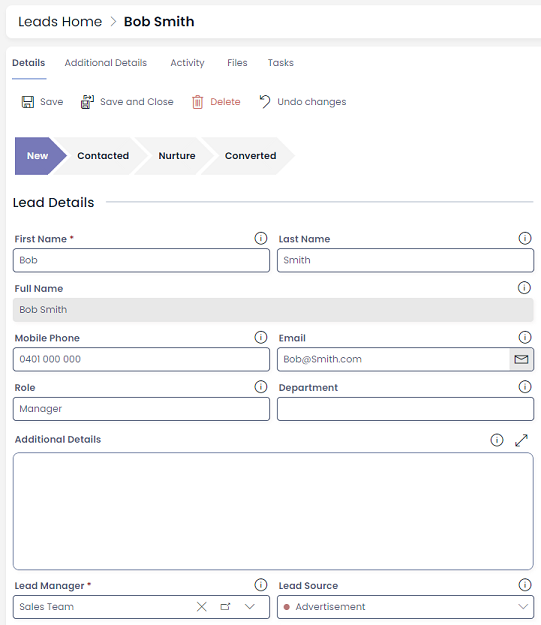
For all reporting features to work the following fields are required: First Name, Lead Manager, Estimated Value, Probability of Success and Estimated Close Date.

A screenshot of the "New Lead" create screen. The create screen appears on the right of the site, and the background of the site is blurred out by the system to draw focus towards the create screen.

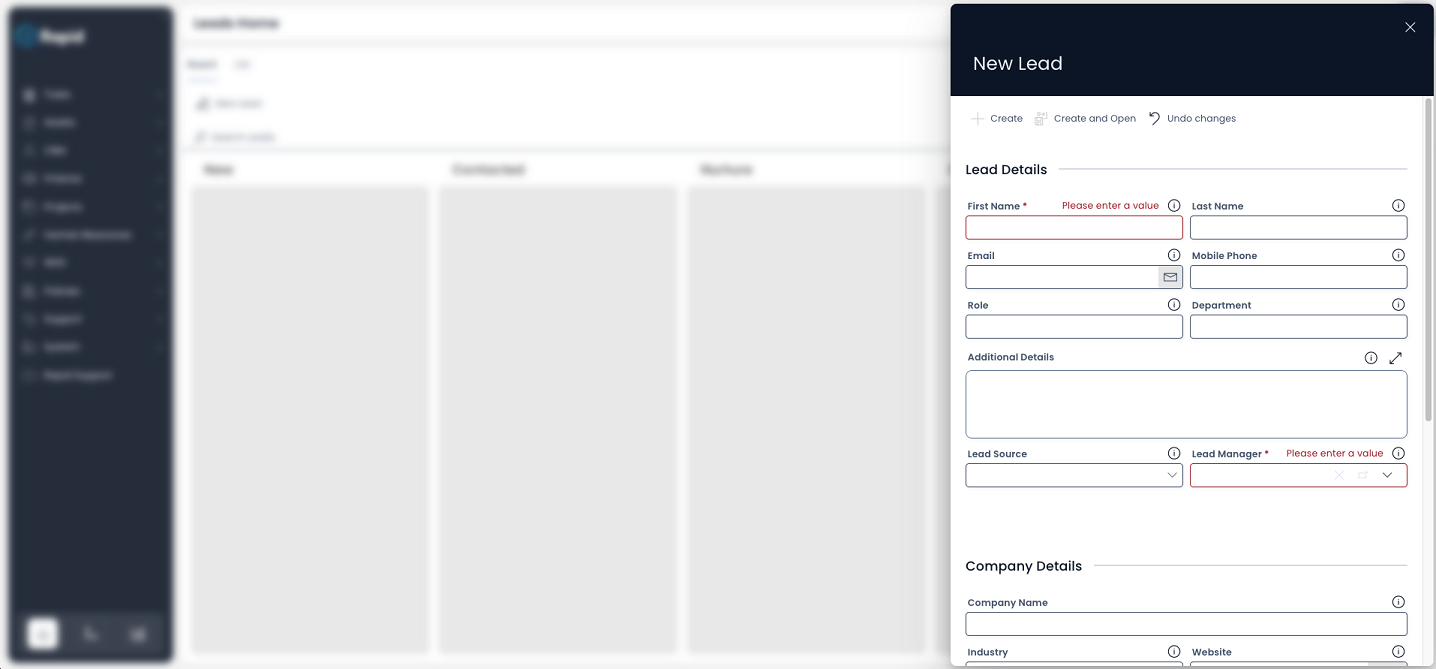
  1. Click on Create or Create and Open.

A screenshot that focuses on the zoomed-in view of the "New Lead" create screen. The screenshot is annotated with a red box to highlight the "Create" and "Create and Open" buttons at the top of the page. The Lead Create Screen contains the following fields and example data: "First Name: Bob", "Last Name: Smith", "Email: Bob@Smith.com", "Mobile Phone: 0401 000 000", "Role: Manager", "Lead Source: Advertisement", "Lead Manager: Sales Team".

Editing a Lead

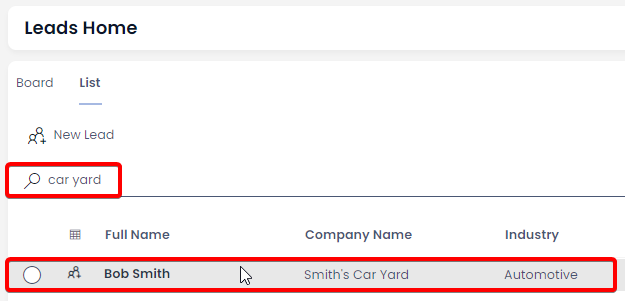
  1. Locate the Lead you wish to edit by either scrolling through the list or using the search bar.

  2. Open the Lead you wish to edit. This can be achieved by:

    • Clicking once on the title field of the item. (The title field will appear in bold text).
    • Double-clicking anywhere on the item's row

A screenshot demonstrating how the user can open a Lead item. The screenshot depicts the Leads data table. The screenshot is annotated with two red boxes: the first one indicates that the user has searched for the phrase "car yard", to filter the table results to only show items that contain this phrase in their searchable columns. The second red box highlights an item row that the user is hovering over.

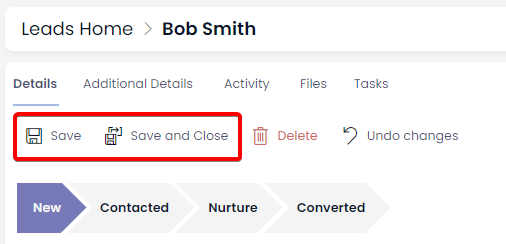
  1. Edit any relevant fields on the Lead Details page as needed.

A screenshot of the details tab of a leads item page. The page contains the following: a tab strip, and command bar, a sales pipeline, and the leads details section.

  1. Once you have finished editing, click on Save or Save and Close.

A screenshot depicting the location and appearance of the "Save" and "Save and Close" buttons. These buttons appear in the Command Bar at the top of the page. The screenshot is annotated with a red box to highlight the location of these buttons.

Deleting Leads

It is not recommended to delete a lead if it is lost; instead, change its status to Lost. This way, you can maintain a list of all your leads and determine a conversion rate.

However, if you need to delete a lead due to incorrect data entry or a duplicate entry, you can do so in two ways: from the list or from the item page. Deleting from the list allows you to delete multiple leads at once.

Deleting Multiple Leads via the Leads Table

  1. Select the Lead(s) you wish to delete by pressing their selection circles

A screenshot demonstrating that multiple lead items can be selected via the selection circles on the far left of the item row.

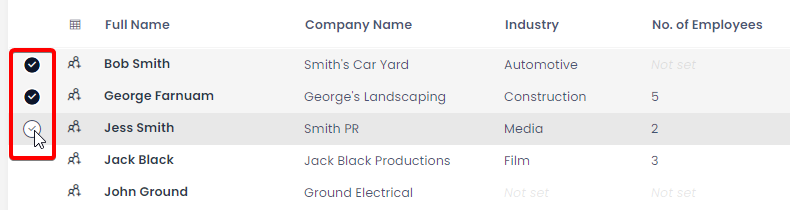
  1. Click on the Delete X Leads button.

A screenshot of the "Delete" button that appears when multiple items are selected on the leads list table. The button has a red icon of a trash can and a red label that reads: "Delete 2 Leads" because there are two items selected. The screenshot is annotated with a red box that highlights the location of the "Delete" button.

Deleting a Single Lead via an Item Page

  1. Find the Lead item you wish to delete by either scrolling through the list or using the search bar

  2. Open the Lead item

A screenshot demonstrating how the user can open a lead item. The screenshot depicts the Leads data table. The screenshot is annotated with a red box which highlights an item row that the user is hovering over.

  1. Press Delete

A screenshot of the "Delete" button that appears on a lead item page. The button has a red icon of a trash can and a red label that reads: "Delete". The screenshot is annotated with a red box that highlights the location of the "Delete" button.